Difference between revisions of "Amazon Web Services"
(→Web Services) |
|||
| (19 intermediate revisions by the same user not shown) | |||
| Line 1: | Line 1: | ||
| + | == AWS Refresher 2013 == | ||
| + | |||
| + | * Download Amazon S3 Organizer(S3Fox) - S3Fox Organizer helps you organize/manage/store your files on Amazon S3 - https://addons.mozilla.org/en-us/firefox/addon/amazon-s3-organizers3fox/ | ||
| + | * While connecting to S3 using Bucket Explorer, you have to provide these Access Key and Secret Key. Go to Security credentials > Access credentials > access keys > secret key - https://portal.aws.amazon.com/gp/aws/securityCredentials | ||
| + | |||
| + | * Using Firefox 20.0 on Mac OS 10.7 - S3 Fox Plugin doesnt work, so i switch browser. | ||
| + | ** WIndows: Cloudberry - http://www.cloudberrylab.com/ | ||
| + | ** Mac: Cyberduck | ||
| + | |||
== Amazon Web Services 101, Cloud Computing Seminar, 14 June 2012 == | == Amazon Web Services 101, Cloud Computing Seminar, 14 June 2012 == | ||
| Line 49: | Line 58: | ||
[[Image:awsconsolecloudfront.jpg|800px]] | [[Image:awsconsolecloudfront.jpg|800px]] | ||
| + | |||
| + | [[Image:awsconsoledistribution.jpg|800px]] | ||
* Go to Cloudfront > Create Distribution (Follow the dropdown menus) | * Go to Cloudfront > Create Distribution (Follow the dropdown menus) | ||
| Line 54: | Line 65: | ||
* Go back to your bucket under S3. Load it up. Select the bucket and click on actions to see Properties. | * Go back to your bucket under S3. Load it up. Select the bucket and click on actions to see Properties. | ||
* Go to website > and tick Enabled. | * Go to website > and tick Enabled. | ||
| − | |||
| − | |||
| − | |||
* At this point the image you uploaded is now online at two places: | * At this point the image you uploaded is now online at two places: | ||
| − | + | ** Bucket domain: dbbdupsingapore.s3-website-ap-southeast-1.amazonaws.com/merlion.jpg | |
| − | + | ** Cloudfront: d3d7rogzicqdgz.cloudfront.net/merlion.jpg | |
| − | * Bucket domain: dbbdupsingapore.s3-website-ap-southeast-1.amazonaws.com/merlion.jpg | ||
| − | * Cloudfront: d3d7rogzicqdgz.cloudfront.net/merlion.jpg | ||
* Go back to EC2. | * Go back to EC2. | ||
| Line 72: | Line 78: | ||
* Configure your Firewall. If you don't have one/don't know what it is, just choose the default security group. | * Configure your Firewall. If you don't have one/don't know what it is, just choose the default security group. | ||
| − | + | === Security Group === | |
| − | |||
*Security Group - this part a bit over my head. basically you can control access and the firewall within 3 seconds and block IP if you are being hammered by someone. | *Security Group - this part a bit over my head. basically you can control access and the firewall within 3 seconds and block IP if you are being hammered by someone. | ||
*Now it is later. OH I UNDERSTAND NOW. You must set the ICMP and TCP with a new rule to allow all people to see it so that you can ping the IP!!!! Otherwise only a private group can access it... | *Now it is later. OH I UNDERSTAND NOW. You must set the ICMP and TCP with a new rule to allow all people to see it so that you can ping the IP!!!! Otherwise only a private group can access it... | ||
| + | * You should be able to ping the IP in terminal | ||
=== Elastic IP === | === Elastic IP === | ||
| Line 82: | Line 88: | ||
* Elastic IP - Create a new Elastic IP Address | * Elastic IP - Create a new Elastic IP Address | ||
* Generate a new Elastic IP instantly with two button clicks | * Generate a new Elastic IP instantly with two button clicks | ||
| + | |||
| + | [[Image:awselasticip.png|600px]] | ||
| + | |||
| + | [[Image:awsallocate.png|800px]] | ||
| + | |||
* Right click and associate it with something else - your instance for example | * Right click and associate it with something else - your instance for example | ||
* ping the IP - should work if security group is set correct to allow to ping | * ping the IP - should work if security group is set correct to allow to ping | ||
| Line 91: | Line 102: | ||
* chmod 600 yourkey.pem (change permissions for the pem file so u can run it) | * chmod 600 yourkey.pem (change permissions for the pem file so u can run it) | ||
* ssh -i yourkey.pem ec2-user@<YOUR ELASTIC IP> (connecting...) | * ssh -i yourkey.pem ec2-user@<YOUR ELASTIC IP> (connecting...) | ||
| + | |||
| + | [[Image:awsssh.png|800px]] | ||
| + | |||
| + | === start httpd === | ||
| + | |||
* sudo yum update (run some updates/??) | * sudo yum update (run some updates/??) | ||
* sudo yum install httpd (install the web server) | * sudo yum install httpd (install the web server) | ||
* sudo apachectl start (start httpd) | * sudo apachectl start (start httpd) | ||
| + | |||
| + | [[Image:awsyum.png|800px]] | ||
Go to your elastic ip and you will see this screen | Go to your elastic ip and you will see this screen | ||
| − | [[Image:awslinuxonline. | + | [[Image:awslinuxonline.png|900px]] |
* you can login to sftp to see the files, remember to set connection type with private key (yourkey.pem) | * you can login to sftp to see the files, remember to set connection type with private key (yourkey.pem) | ||
* strangely i cannot add files in (WHY????) | * strangely i cannot add files in (WHY????) | ||
| + | * SOLUTION: sudo chmod 777 var/www/html/ | ||
| + | * then you can drop in the file to the var/www/html folder!! | ||
| + | |||
| + | [[Image:awssiteonline.png|300px]] | ||
| + | |||
| + | ITS ONLINE! Okay i spent the entire workshop doing this up to this point. Where is database how does i shot web now i have no idea? | ||
=== database === | === database === | ||
| − | * the class steamrollers on | + | * the class steamrollers on... |
* Launch DB instance | * Launch DB instance | ||
* start mysql engine | * start mysql engine | ||
| + | * management options > backup / can roll back if you need | ||
| + | * DB security group setting to CIDR/IP | ||
| + | * OMG FLAILING ABOUT WILDLY | ||
| + | |||
| + | === Starting to randomly google for help === | ||
| + | These links look interesting but what am i doing? Help | ||
| + | * http://coenraets.org/blog/2012/01/setting-up-wordpress-on-amazon-ec2-in-5-minutes/ | ||
| + | * http://www.colabrativ.com/setup-of-iexperiment-on-amazons-elastic-compute-cloud-ec2-server/ | ||
| + | * http://imperialwicket.com/aws-building-a-lamp-instance | ||
| + | * http://aws.amazon.com/articles/Amazon-EC2/1145 | ||
| − | |||
== See Also == | == See Also == | ||
Latest revision as of 12:03, 26 April 2013
Contents
AWS Refresher 2013
- Download Amazon S3 Organizer(S3Fox) - S3Fox Organizer helps you organize/manage/store your files on Amazon S3 - https://addons.mozilla.org/en-us/firefox/addon/amazon-s3-organizers3fox/
- While connecting to S3 using Bucket Explorer, you have to provide these Access Key and Secret Key. Go to Security credentials > Access credentials > access keys > secret key - https://portal.aws.amazon.com/gp/aws/securityCredentials
- Using Firefox 20.0 on Mac OS 10.7 - S3 Fox Plugin doesnt work, so i switch browser.
- WIndows: Cloudberry - http://www.cloudberrylab.com/
- Mac: Cyberduck
Amazon Web Services 101, Cloud Computing Seminar, 14 June 2012
- Where data is hosted and processed in the cloud because its faster!
Why use AWS
- Elastic capacity
- Quick, easy to deploy
- No contract, no initial investment required, no capital exchange necessary
- Pay as you go (pay for the machine ONLY when you use it, you don't need to own the infrastructure - easy to turn resource on and off)
- Automation
Fun Fact: Dropbox is hosted and run entirely on AWS. Apparently Amazon S3 says their durability is 99.999999999 (11 nines). It says it will only lose one file in a million years.
AWS Infrastructure
- Organised into multiple regions. Each regions have a multiple data centres. If one building burns down the other one still has the data. The customer does not feel interruptions and its highly redundant.
- Start your instances at a region closer to yourself.
- Edge Locations - these automatically help to distribute/serve the data (near Singapore there is Tokyo, Osaka, Hongkong) - a content delivery network
Setting up AWS Account
- Go to http://aws.amazon.com/
- You will need Name, Email, Credit Card (for laters), Phone number
- It will call you to confirm (and you will recite the number back to it and IT WILL MAGICALLY KNOW)
Web Services
- Command Line / API / SDK / Web Console
- Managment Interface > Cross Service Features > AAAAAAAAAAAAHHHH INFORMATION OVERLOAD
Amazon Elastic Compute Cloud (EC2)
Amazon Elastic Compute Cloud (Amazon EC2) is a web service that provides resizable compute capacity in the cloud. It is designed to make web-scale computing easier for developers.
Amazon EC2 presents a true virtual computing environment, allowing you to use web service interfaces to launch instances with a variety of operating systems, load them with your custom application environment, manage your network’s access permissions, and run your image using as many or few systems as you desire.
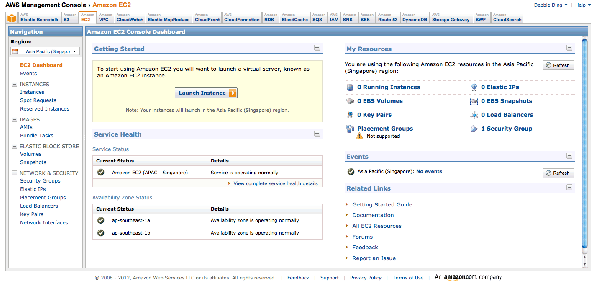
- Go to AWS Management Console
- Click on S3 - https://console.aws.amazon.com/s3/home
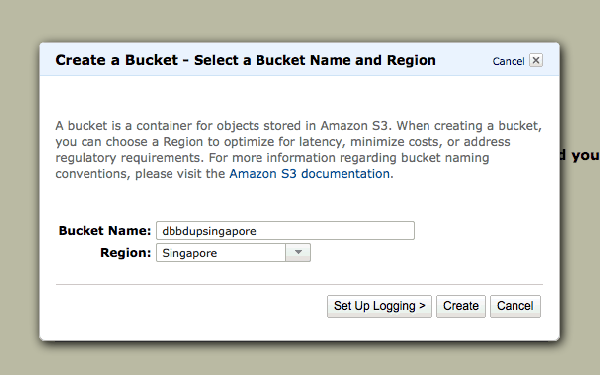
- Create Bucket - this bucket must have a unique name around the entire world
- Try to Upload a File. Upload a simple image. The clock starts ticking, cost of storage is 12.5 cents per gigabyte (but wait! the first 5 gb is free each year).
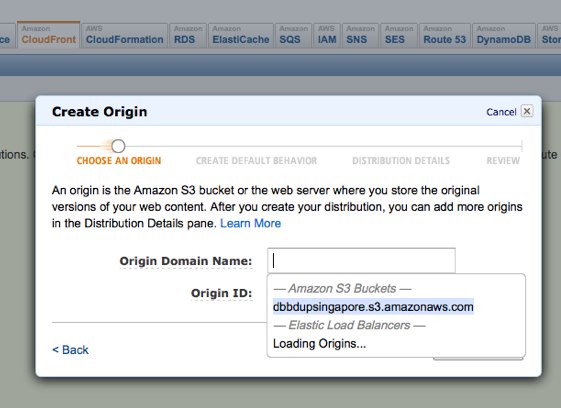
- Go to Cloudfront > Create Distribution (Follow the dropdown menus)
- Note what your domain is (should be xxxxxx.cloudfront.net)
- Go back to your bucket under S3. Load it up. Select the bucket and click on actions to see Properties.
- Go to website > and tick Enabled.
- At this point the image you uploaded is now online at two places:
- Bucket domain: dbbdupsingapore.s3-website-ap-southeast-1.amazonaws.com/merlion.jpg
- Cloudfront: d3d7rogzicqdgz.cloudfront.net/merlion.jpg
- Go back to EC2.
- Press the Launch Instance button
- Request Instance
- Choose an AMI (Amazon Machine Image) - i chose linux
- Provide instance details.
- Create a keypair. If you lose the Key pair for an instance, you will never find it from amazon so your machine will not be available anymore ever again.
- You will receive a .pem (key access file). Save this in a safe place. Or back it up.
- Configure your Firewall. If you don't have one/don't know what it is, just choose the default security group.
Security Group
- Security Group - this part a bit over my head. basically you can control access and the firewall within 3 seconds and block IP if you are being hammered by someone.
- Now it is later. OH I UNDERSTAND NOW. You must set the ICMP and TCP with a new rule to allow all people to see it so that you can ping the IP!!!! Otherwise only a private group can access it...
- You should be able to ping the IP in terminal
Elastic IP
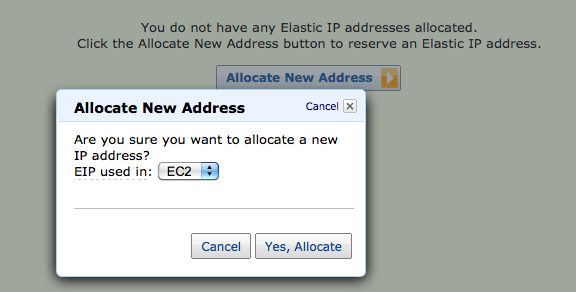
- Elastic IP - Create a new Elastic IP Address
- Generate a new Elastic IP instantly with two button clicks
- Right click and associate it with something else - your instance for example
- ping the IP - should work if security group is set correct to allow to ping
ssh
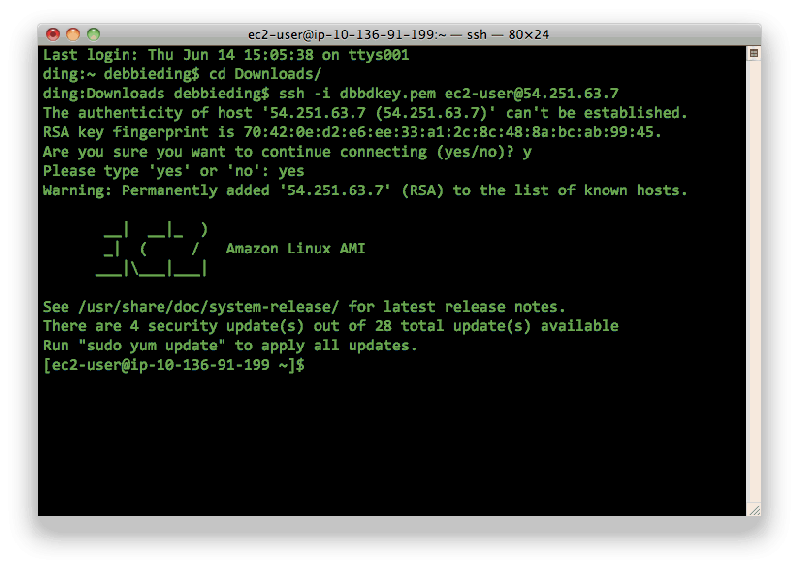
- Open terminal and find the pem file
- RUN THE FOLLOWING:
- chmod 600 yourkey.pem (change permissions for the pem file so u can run it)
- ssh -i yourkey.pem ec2-user@<YOUR ELASTIC IP> (connecting...)
start httpd
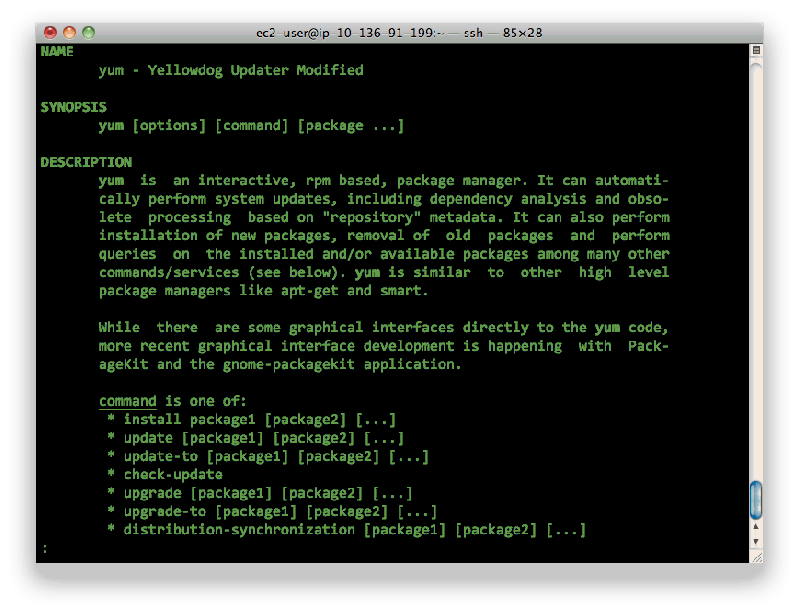
- sudo yum update (run some updates/??)
- sudo yum install httpd (install the web server)
- sudo apachectl start (start httpd)
Go to your elastic ip and you will see this screen
- you can login to sftp to see the files, remember to set connection type with private key (yourkey.pem)
- strangely i cannot add files in (WHY????)
- SOLUTION: sudo chmod 777 var/www/html/
- then you can drop in the file to the var/www/html folder!!
ITS ONLINE! Okay i spent the entire workshop doing this up to this point. Where is database how does i shot web now i have no idea?
database
- the class steamrollers on...
- Launch DB instance
- start mysql engine
- management options > backup / can roll back if you need
- DB security group setting to CIDR/IP
- OMG FLAILING ABOUT WILDLY
Starting to randomly google for help
These links look interesting but what am i doing? Help
- http://coenraets.org/blog/2012/01/setting-up-wordpress-on-amazon-ec2-in-5-minutes/
- http://www.colabrativ.com/setup-of-iexperiment-on-amazons-elastic-compute-cloud-ec2-server/
- http://imperialwicket.com/aws-building-a-lamp-instance
- http://aws.amazon.com/articles/Amazon-EC2/1145
