Difference between revisions of "Redesigning Sound"
From Wikicliki
(→Testing the Accelerometer) |
(→Fixing up the Audio Jack) |
||
| Line 177: | Line 177: | ||
=== WORKING AUDIO OUTPUT FOR ARDUINO CIRCUIT === | === WORKING AUDIO OUTPUT FOR ARDUINO CIRCUIT === | ||
[[File:workingaudio.png]] | [[File:workingaudio.png]] | ||
| + | * Adapted from: http://apcmag.com/arduino-project-5-digital-audio-player.htm | ||
* iTunes Conversion: | * iTunes Conversion: | ||
** Click > Edit > Preferences > Import Settings | ** Click > Edit > Preferences > Import Settings | ||
Revision as of 17:17, 11 November 2013
Contents
Process
Tutorial with Yuri, 31 oct
- surround haptics - sound / haptic / visual / feedback
- usb sound output for playing back sounds
Guides / Tutorials / Gear
- Build your own diy binaural mic: http://tbug.jp/diybinaural/
- Accelerometer, Gyro and IMU Buying Guide: https://www.sparkfun.com/pages/accel_gyro_guide
- Sound bug - http://www.katronix.webplusshop.com/product.wml/source/RSS/productid/197432
Interesting links
- http://www.nellyben.com/projects/the-international-space-orchestra/
- http://en.wikipedia.org/wiki/Geophone
Brainstorming, 31 oct
Bucket of links
- http://en.wikipedia.org/wiki/Geiger_counter
- http://www.martinluge.de/work/digitalWind/
- http://www.katiepaterson.org/icerecords/
- http://www.the-product.org/
- http://en.wikipedia.org/wiki/Binaural_beats
- http://en.wikipedia.org/wiki/Auditory_illusion
- http://en.wikipedia.org/wiki/Sonification
- http://news.bbc.co.uk/1/hi/england/hampshire/8291720.stm
- http://www.bbc.co.uk/news/technology-23665490
- https://www.youtube.com/watch?v=iwfsFtpACFw
- http://en.wikipedia.org/wiki/Claustrophobia
- dream layers of lift: https://www.youtube.com/watch?v=KpDd7pQRKHI
- http://en.wikipedia.org/wiki/Cymatics
- http://vimeo.com/68768890
- http://laughingsquid.com/hear-heres-giant-ear-trumpet-sculptures-highlight-sounds-of-nature/
- http://www.brainpickings.org/index.php/2010/09/30/837-kilo-ohm-erwin-stache/
- http://www.julianneswartz.com/work_archive/work.php
Tutorial with Mike, 1 nov
- Recommended to use triple axis accelerometer - ADXL362 - already has arduino library written for it
- accelerometer only measures acceleration. think of acceleration in terms of integration, velocity, position...
- with regards to printing our own pcb - can do laser cut or acetate / pcb toner transfer
- sound - look up trigger mp3 with sd card slot
- also think about amplifier and power source
Weekend + Tutorial with Mike and Dave, 4 Nov 2013
- concept - what about instead of using live sound, just use sound that represents the floor - radio waves and their material form - what if it were the opposite and the sound only plays when the door opens. augmented reality.
- how about thinking about lift culture, fantasies about lifts as transportation to different planes and levels of reality, charlie and the chocolate factory, being john malkovich, the lift sighing in the hitchhiker's guide to the galaxy
- what about using baby monitor or walkie talkie
- think about the presentation - video response? sound player? other forms?
- david tudor's rainforest
- whispering lift? a lift that whispers secrets from the outside in
- http://apcmag.com/arduino-project-5-digital-audio-player.htm
- http://maxoffsky.com/maxoffsky-blog/how-to-play-wav-audio-files-with-arduino-uno-and-microsd-card/
- Robersontronics MP3 Trigger board - https://vimeo.com/67617269 - https://www.sparkfun.com/products/11029
- SKU 146706 Micro SD Card Storage Memory Board Module for Arduino (Works with Official Arduino Boards)
- Kingston 8 GB microSDHC Class 4 Flash Memory Card SDC4/8GBET
- http://australianrobotics.com.au/catalog/batteries-and-power
- http://playground.arduino.cc/Learning/9VBatteryAdapter
- ALTERNATIVELY: ARDUINO WIFI SHIELD AND ETHERNET SHIELD ALREADY HAVE INBUILT microSD slot !!!!
- 9V Battery Adaptor for Arduino - http://playground.arduino.cc/Learning/9VBatteryAdapter
- 9V battery clip
- 2.1mm power plug as above
- 3mm shrink tube
- File Storage for sound files
- Arduino Wifishield http://arduino.cc/en/Guide/ArduinoWiFiShield
- Use SD library to read/write/save to sd card: http://arduino.cc/en/Reference/SD
- Sound Libraries to play WAV files
- Arduino library for asynchronous playback of PCM/WAV files direct from SD card - https://github.com/TMRh20/TMRpcm
- SoundWave - A modification of a library with the same name by Adafruit Industries that allows playing sound from an SD card directly on your Arduino board without any Digital to Analog Converter (DAC). It uses pin 3 on your Arduino Uno board to push out the sound. Just plug a soundjack from an amplifier and share ground with the Arduino to listen to the sound. - https://github.com/dcuartielles/SoundWave - http://cuartielles.com/verkstad/edu/Courses1BitSound/PlayWAVsound
- Convert Audio to 8bit 16Khz mono - http://cuartielles.com/verkstad/edu/Courses1BitSound/PrepareWAVsound
- Requires: Transistor 2N2222
4 Nov 2013
- Walkie Talkie and Baby Monitor were tested but had too short a range to be useful
ACTION PLAN
LOBBY TO-DO
Description: Muzak that blends into an annoying sound if there are too many people in the lobby.
Goal: Make people leave if they are too many.
- Lasers
- Mirror arrangement
- Light Sensors Soldering
- Laser/Light Testing in Lobby
- Speaker soldering/set up
- Script for Sound
- Sound Design
LIFT TO-DO
Description: Inside-out lift
Goal: Making the inaudible AUDIBLE
- Accelerometer Soldering
- Accelerometer Testing in Lift
- Record Lift door timings
- SD Card Module Soldering
- SD Card Testing
- Laser and Light Sensor arrangement
- Speakers soldering/set up
- External Power for both arduino and speaker.
- Sound Design
- Script for Sound
Testing the Accelerometer
- http://biosport.ucdavis.edu/blog/how-to-calculate-static-lean-and-pitch-angles-from-accelerometer-measurements ???
- ADXL362 Arduino Library - http://annem.github.io/ADXL362/ - Downloaded the library and running the ADXL362_SimpleRead.ino example
- Instructions were - Connect SCLK, MISO, MOSI, and CSB of ADXL362 to SCLK, MISO, MOSI, and DP 10 of Arduino - Refer to http://arduino.cc/en/Reference/SPI for corresponding arduino pins
- MISO (Master In Slave Out) - 12 - The Slave line for sending data to the master,
- MOSI (Master Out Slave In) - 11 - The Master line for sending data to the peripherals,
- SCK (Serial Clock) - 13 - The clock pulses which synchronize data transmission generated by the master
- SS (Slave Select) - 10 - the pin on each device that the master can use to enable and disable specific devices.
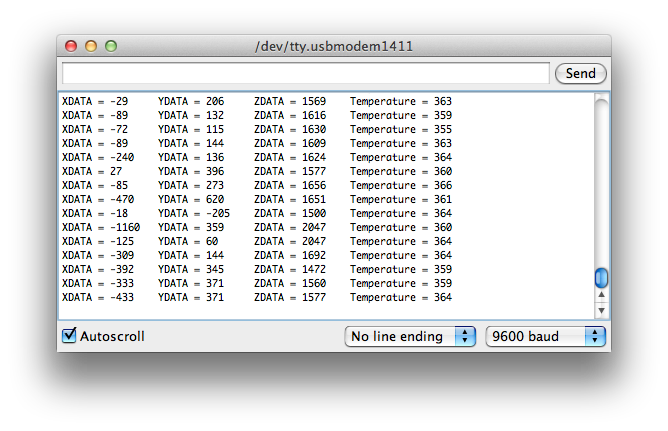
- Result:
- Why so confusing? Apparently numbers are wrong because we lack Logic level converter.
- http://www.coolcomponents.co.uk/logic-level-converter.html
- https://learn.sparkfun.com/tutorials/using-the-logic-level-converter
- http://www.wikihow.com/Make-a-Voltage-Divider-Circuit
Using another accelerometer
Testing RC Switch
Testing the SD Library
- sd reference - http://arduino.cc/en/Reference/SD
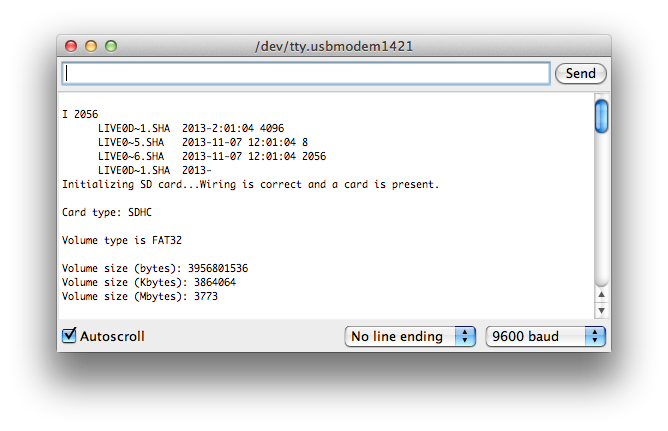
- Result:
- next goal: audio playback of wav file on sd card reader......
WORKING SCRIPT FOR PLAYING BACK A WAV FILE ON THE SD CARD READER!!!!
- use this library - https://github.com/TMRh20/TMRpcm
#include <SD.h>
//#define SD_ChipSelectPin 10
#include <TMRpcm.h>
const int chipSelect = 4;

TMRpcm tmrpcm;
char mychar;

void setup(){

  tmrpcm.speakerPin = 9;

   Serial.begin(9600);
  Serial.print("Initializing SD card...");
  // make sure that the default chip select pin is set to
  // output, even if you don't use it:
  pinMode(10, OUTPUT);

  // see if the card is present and can be initialized:
  if (!SD.begin(chipSelect)) {
    Serial.println("Card failed, or not present");
    // don't do anything more:
    return;
  }
  Serial.println("card initialized.");

  if (SD.exists("SS.WAV")) {
    Serial.println("SS.WAV exists.");
  }
  else {
    Serial.println("SS.WAV doesn't exist.");
  }

   tmrpcm.play("SS.WAV");
}

void loop(){
 return;}
Testing the Wifi shield
- http://arduino.cc/en/Hacking/WiFiShieldFirmwareUpgrading
- https://www.sparkfun.com/products/11287
- http://arduino.cc/en/Guide/ArduinoWiFiShield
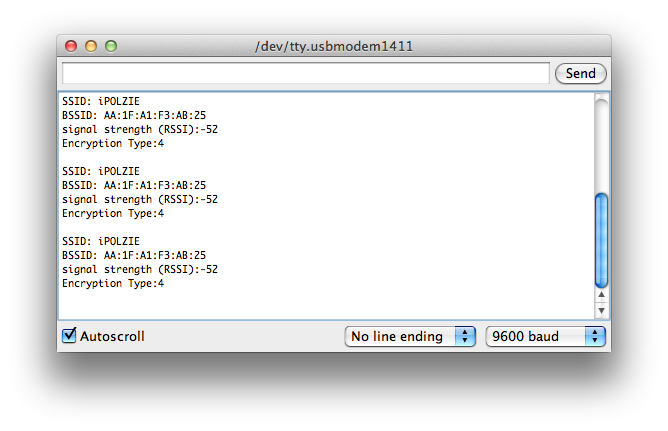
- Result: Does not connect to Eduroam because its WPA2 Enterprise. :-(
- Solution: Project wifi network from smartphone.
Fixing up the Audio Jack
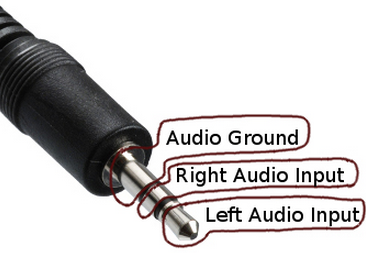
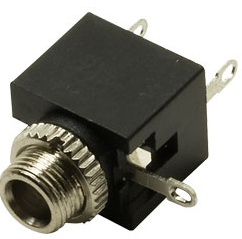
- ok so we've got a 3.5mm Mono Miniature Jack Socket
- http://mpuprojectblog.wordpress.com/2013/01/27/about-jeff-rowbergs-i2c-lib-for-the-mpu-6050/
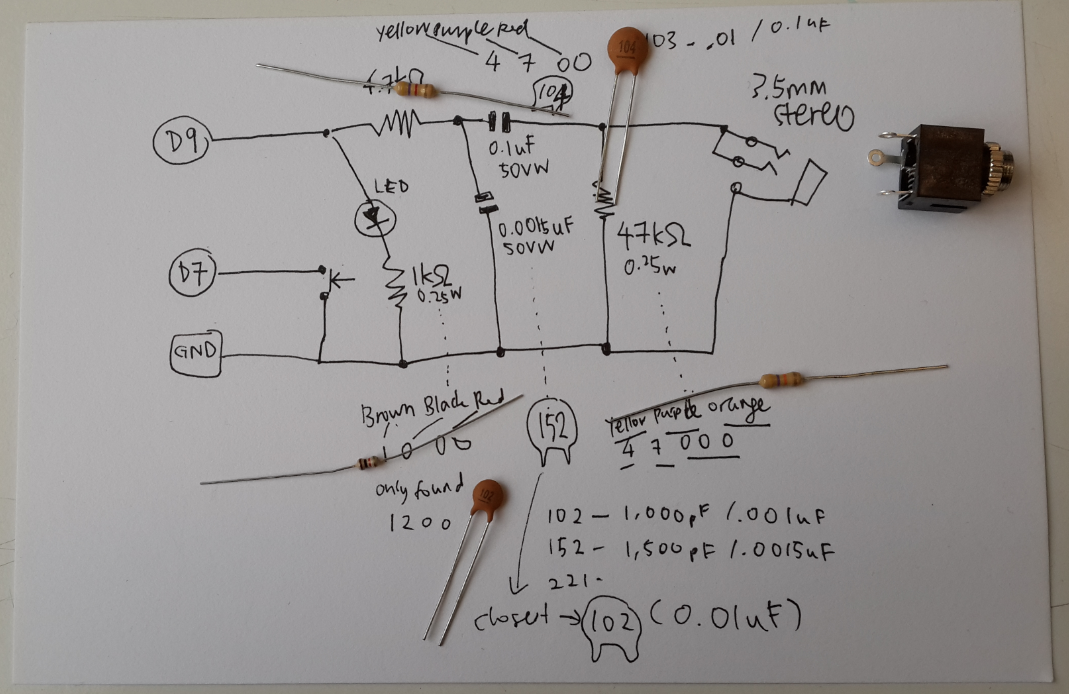
WORKING AUDIO OUTPUT FOR ARDUINO CIRCUIT
- Adapted from: http://apcmag.com/arduino-project-5-digital-audio-player.htm
- iTunes Conversion:
- Click > Edit > Preferences > Import Settings
- Change the dropdown to WAV Encoder and Setting: Custom > 16.000kHz, 8-bit, Mono
- Right click any file in iTunes, and select "Create WAV Version"
- Copy file to SD card using computer
Combining the accelerometer and the audio
- Error: "DMP Initialization failed (code 1)"
- The DMP, or Digital Motion Processor, is an internal processing unit contained within the MPU-6050 and its successors (MPU-6150, MPU-9150, possibly more in the future). The processor has been described by InvenSense employees as a sort of limited CPU, or alternatively as an enhanced ALU (arithmetic logic unit), which is built with an instruction set designed for very specific 3D math operations necessary for orientation calculation. There is currently no known resource for understanding what this instruction set is or how it works.
